December 4, 2015
How To Manage QA Activities with Rally
The purpose of this blog is to describe how we can manage activities like test set, test cases from creation to execution, and other QA activities using the tool Rally. While doing testing in my current project, I was facing challenges when pulling out a Test case execution report for each release in the iteration.
I have used the test set feature, which helps me to manage test cases efficiently for regression testing and to get the report of each release.I want to share the different ways of Test case creation using Rally and how we can use Rally Add-in to import test cases from MS-Excel directly.
I also want to share how Rally can help us keep the quality track and the history of the build or release, as well as how Rally can be used automatically (having the tests updated with results from running automation tests).
What is Rally?
Rally is an agile project management solution that provides release planning, iteration planning, the ability to schedule all or parts of requirements from release backlog, and the ability to manage other QA activities.
What is a Test Set?
A test set is a container for test cases, which can be run in an iteration or release. Test sets allow you to group and schedule regression tests in an iteration or release. For example, a test set could include smoke, configuration, system, and so on. Once grouped, you can run test cases together.
Steps to Manage Test Cases and other QA Activities in my Current Project
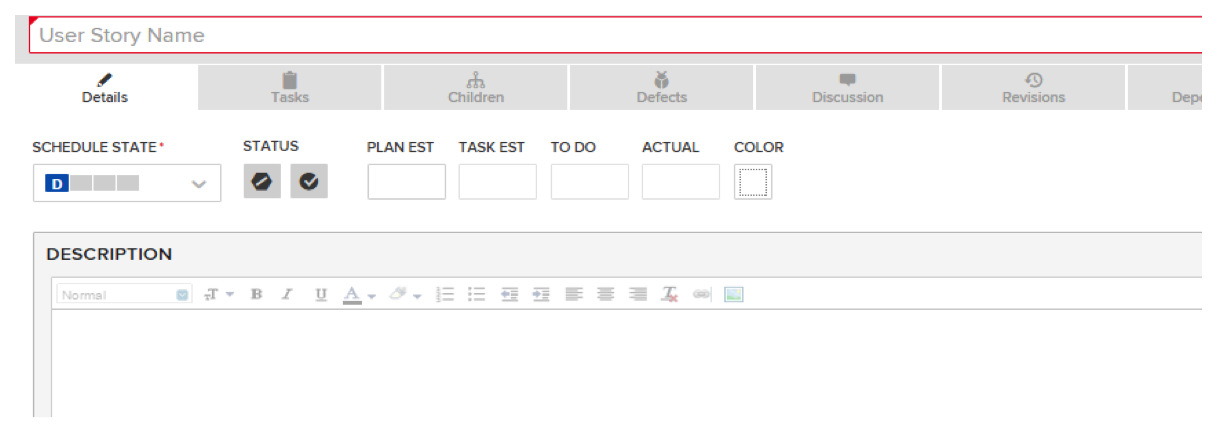
Create work product or story
The first step in the creation of test cases is to create the work product or story. Below are the steps to create this:
Prerequisite: the user should have a valid Rally credential
Click on Plan -> User Stories then Action -> New User Story
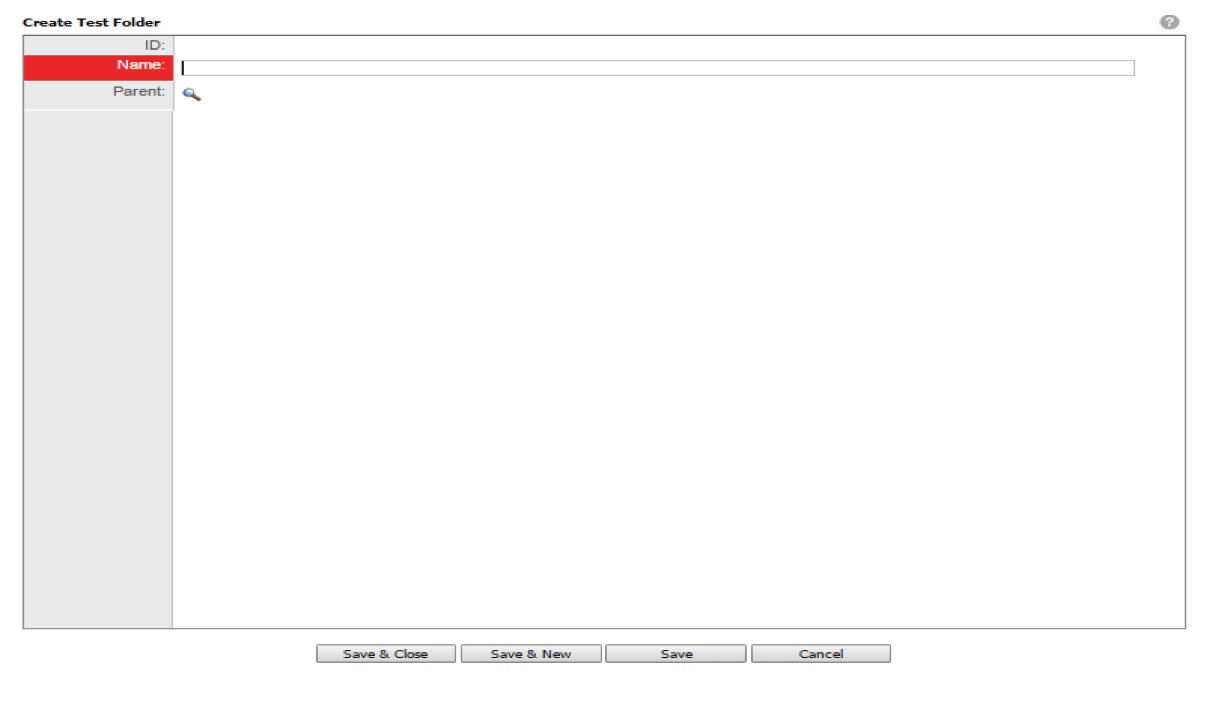
Create Test Plan
To create a test plan, follow the steps below:
From Quality, select Test Plan. From Actions, select New Test Folder. On the Create Test Folder editor, enter the name of your new test folder.
Finally, click Save & Close.
Create Test Cases
There are three ways to create test cases:
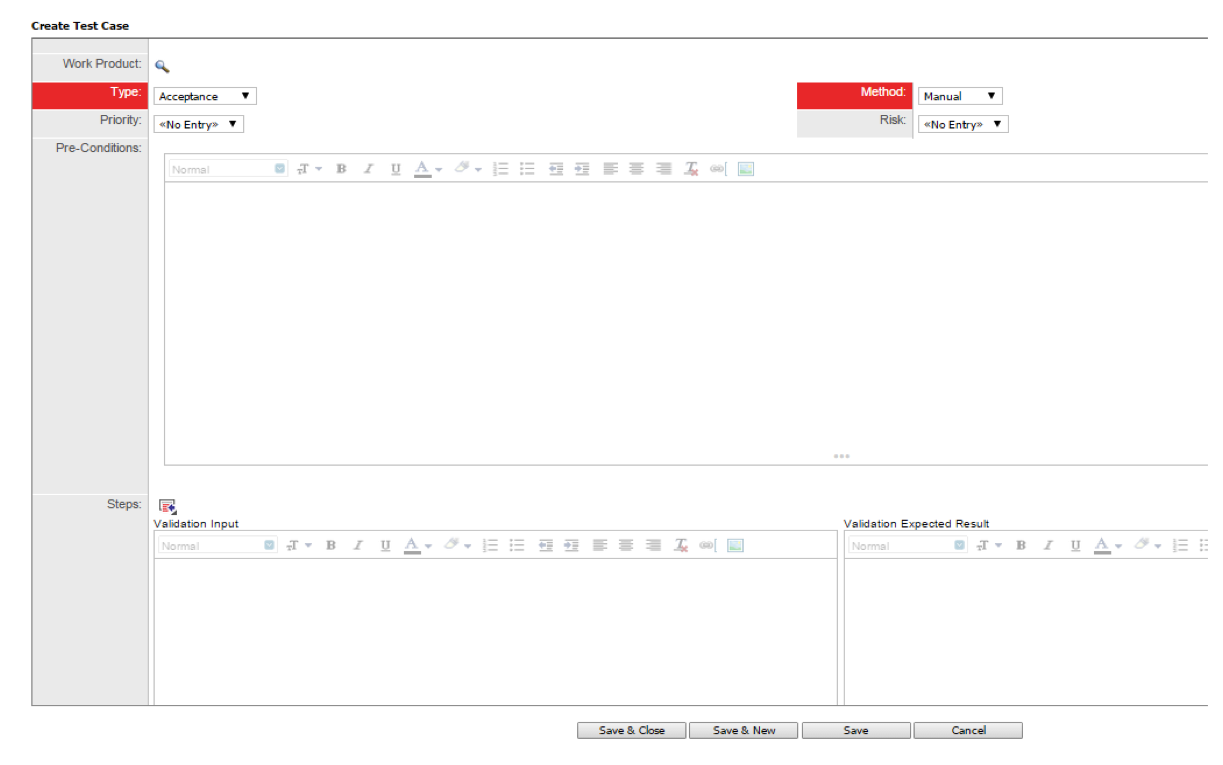
1. Create test cases as a stand-alone: The first way to create the test cases is as stand-alone. Use the following to do so: Click the Quality tab -> Test Cases, from Actions -> Click New Test Case. The following screen will open to enter test case detail with the option to link the test case with a work product.
2. Create test cases by importing directly in Rally using a .csv file. The second way to create test cases is by importing them from a .csv file. Below are steps to import the test cases from .csv file:
- Create an Excel file that’s correctly formatted and convert this excel file into a .csv file
- Click the Quality tab -> Test Cases, From Actions -> Click on Import Test Case
- Click browse button and select .csv file and click on Import button. Imported test cases can be verified under Quality tab -> Test Plan
3. Create test cases using the Rally add-in for Excel. The third way to create test cases is by importing a test case directly from Excel using “Rally Add-in for Excel.” Below are the steps to import the test cases using Add-in:
- Install the Add-in: download RallyAddinForExcel_2.3.3.msi. To install, run the .msi file
- Set up the Add-in within Excel: Once you install the Add-in, a new Rally tab will display in the Excel ribbon
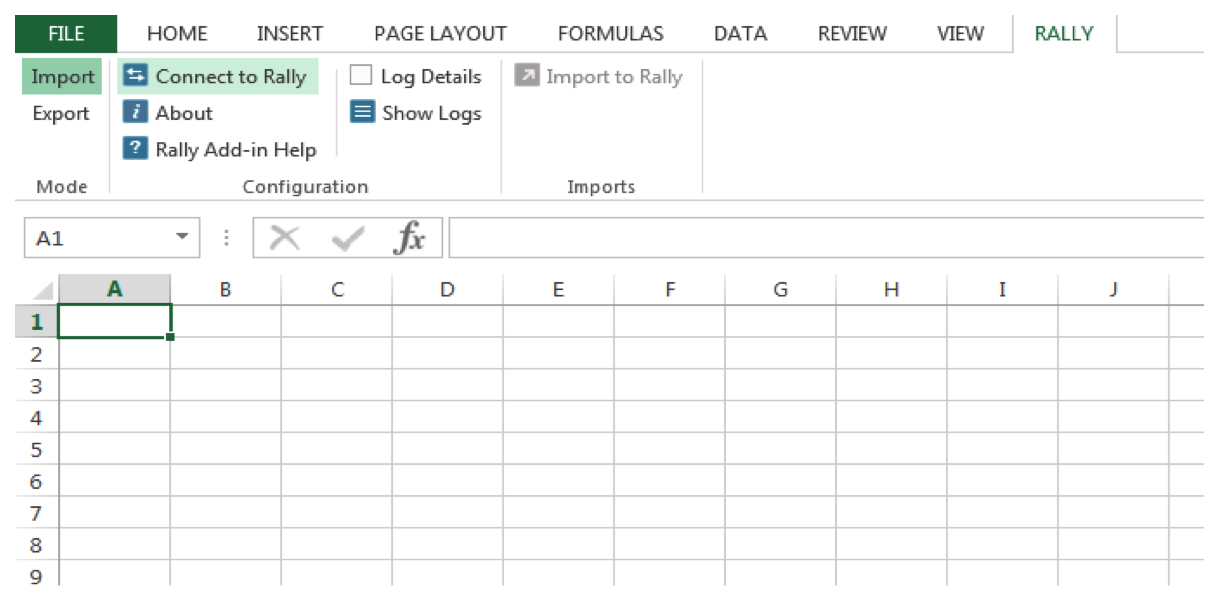
- Click on the Connect to Rally icon in the Excel file and enter the Rally server URL (defaul is rally1.rallydev.com), username, and password
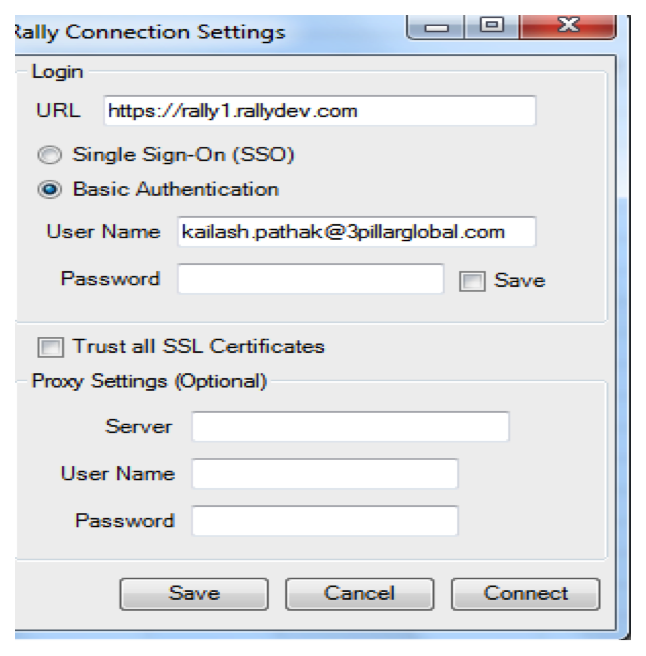
- After entering a valid username and password, click on the Connect button. After a few seconds, the Import to Rally button will enable an Excel file to import the test cases
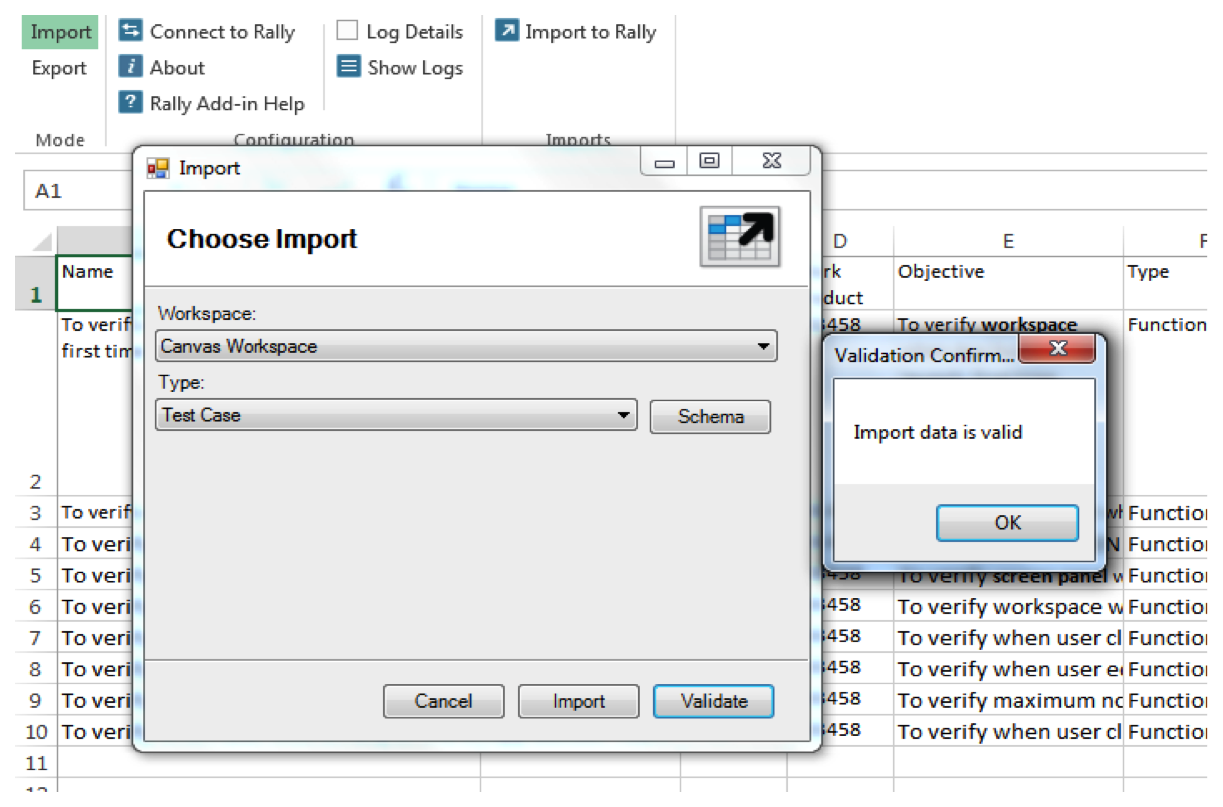
- Click on the Import to Rally button and the screen below will open to import the test cases
- Select type of Test Case
- Click on the Validate button to make sure that the import file format is valid. As a user, click on the Validate button, and if everything is fine, the message “Import data is valid” will display
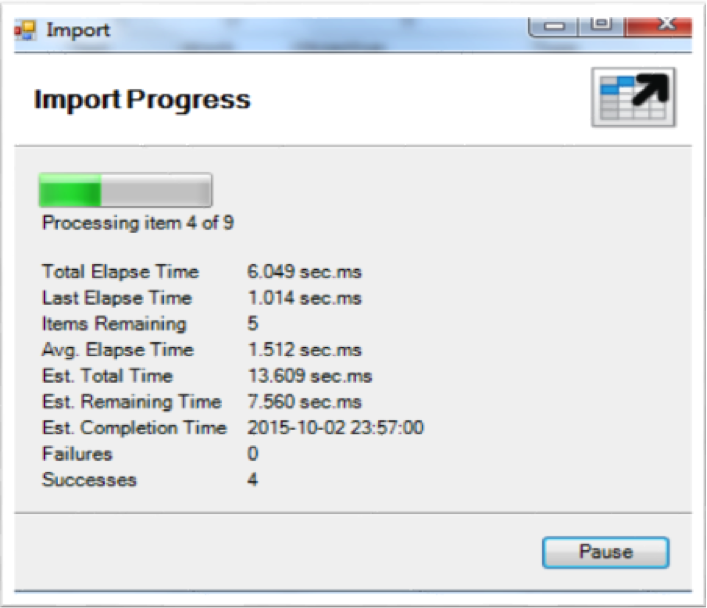
- Once the test case format is validated, the next step is to import the test cases in Rally. Click on the Import button shown in the screenshot above
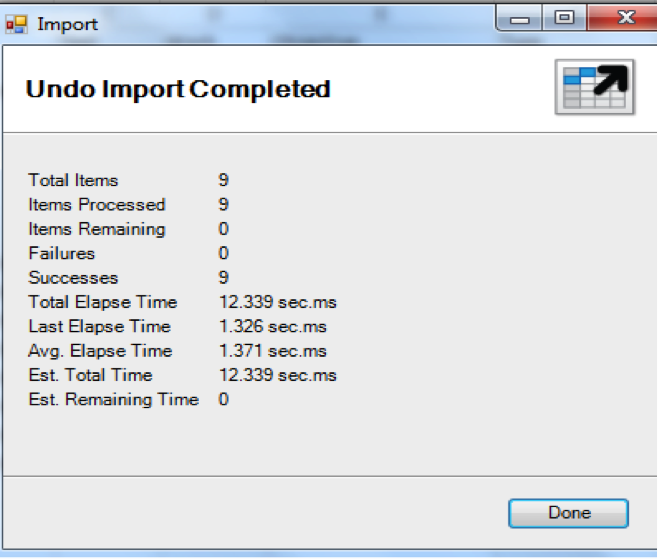
- Once the import is completed, the user can verify the imported test cases under Quality -> Test Plan -> Test Folder
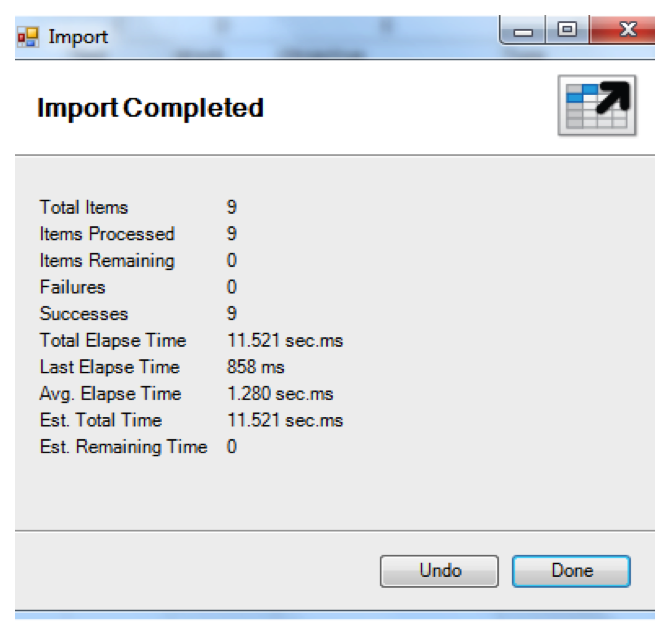
- The user can undo the imported test cases by clicking on the Undo button
Create Release Cycle
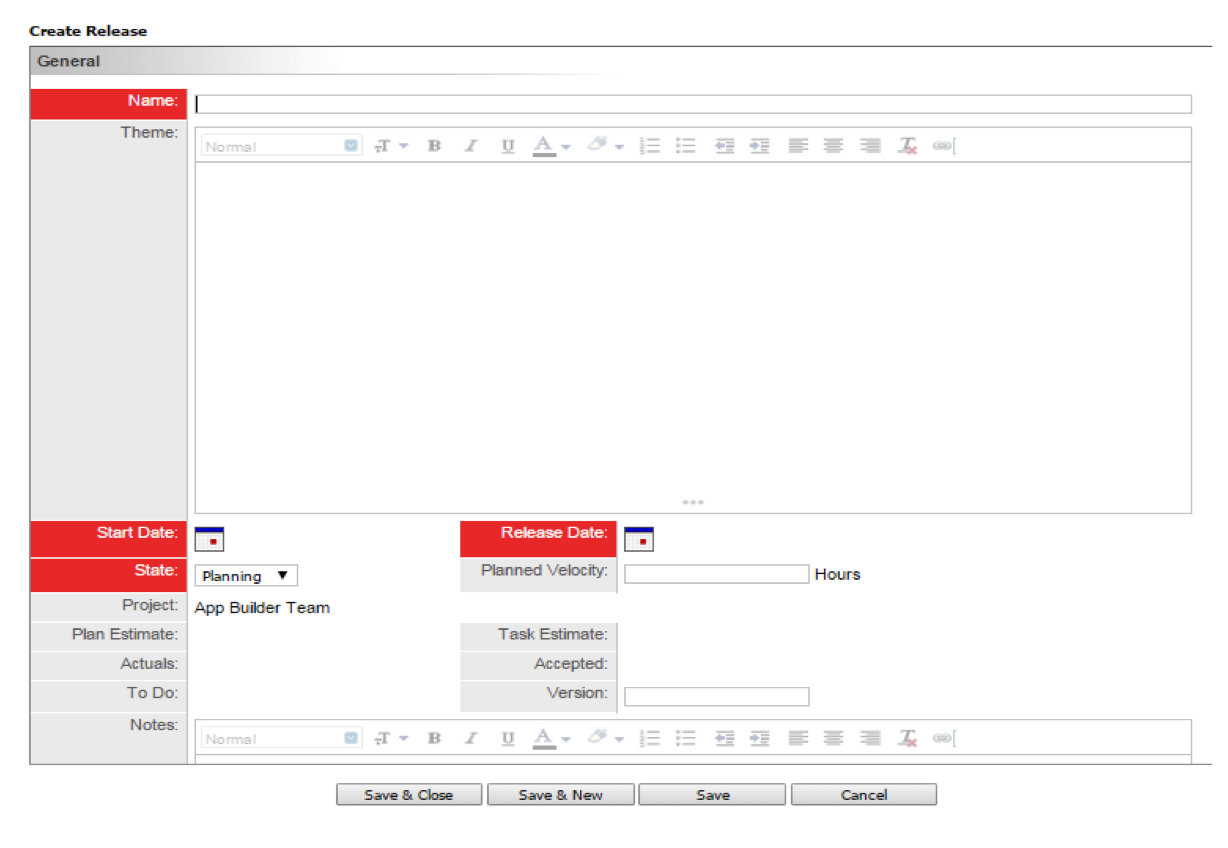
The next step is to create the release cycle. To create the release cycle, click on the Plan -> Time boxes. Then click on “Add with detail;” the following screen will open for the user to enter release data.
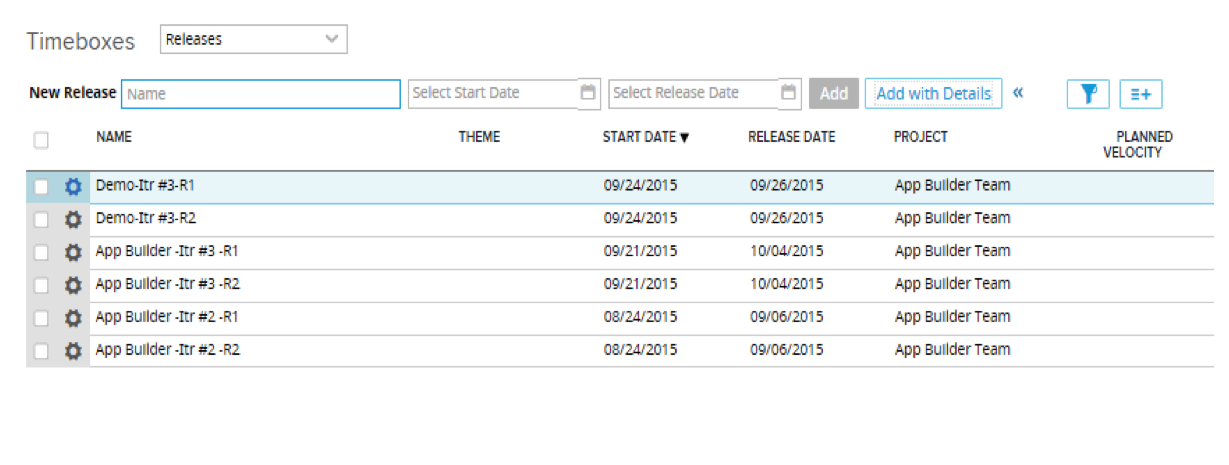
In the screen below, we have created two cycles/releases for the iteration. We will execute test cases for two cycles (this varies from project to project) for each story.
Create Test Sets
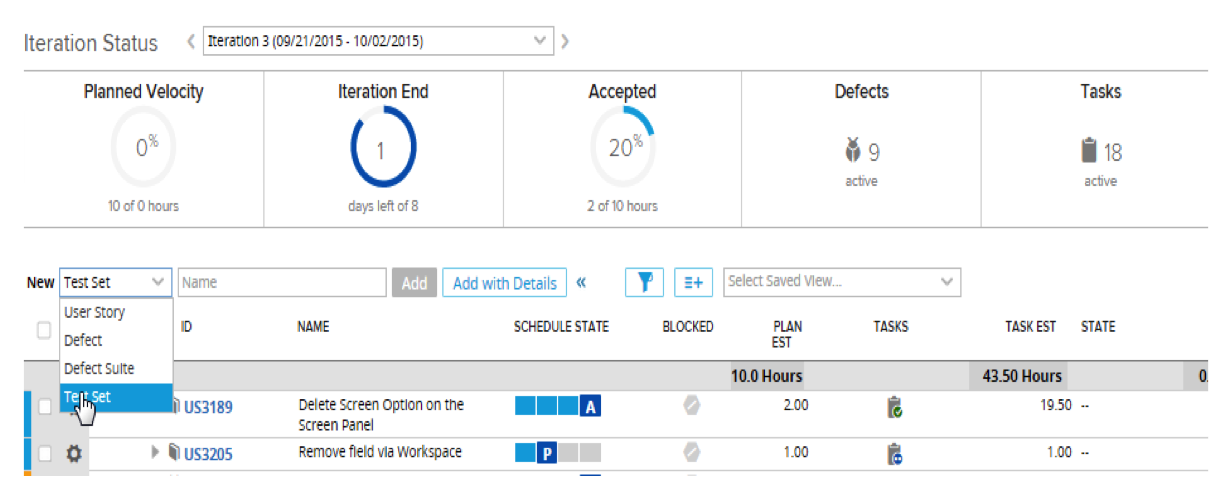
The next step is to create the test set. A test set is a container for test cases that can be run in an iteration or release. To create test sets, click the Track tab, then select Iteration Status or Release Status.
- On the Iteration Status page, select Test Set from the drop-down menu and click the Add New button
- On the Release Status summary page, click Actions and then select Schedule New Test Set

Linking Between Test Set, Release, and Iteration
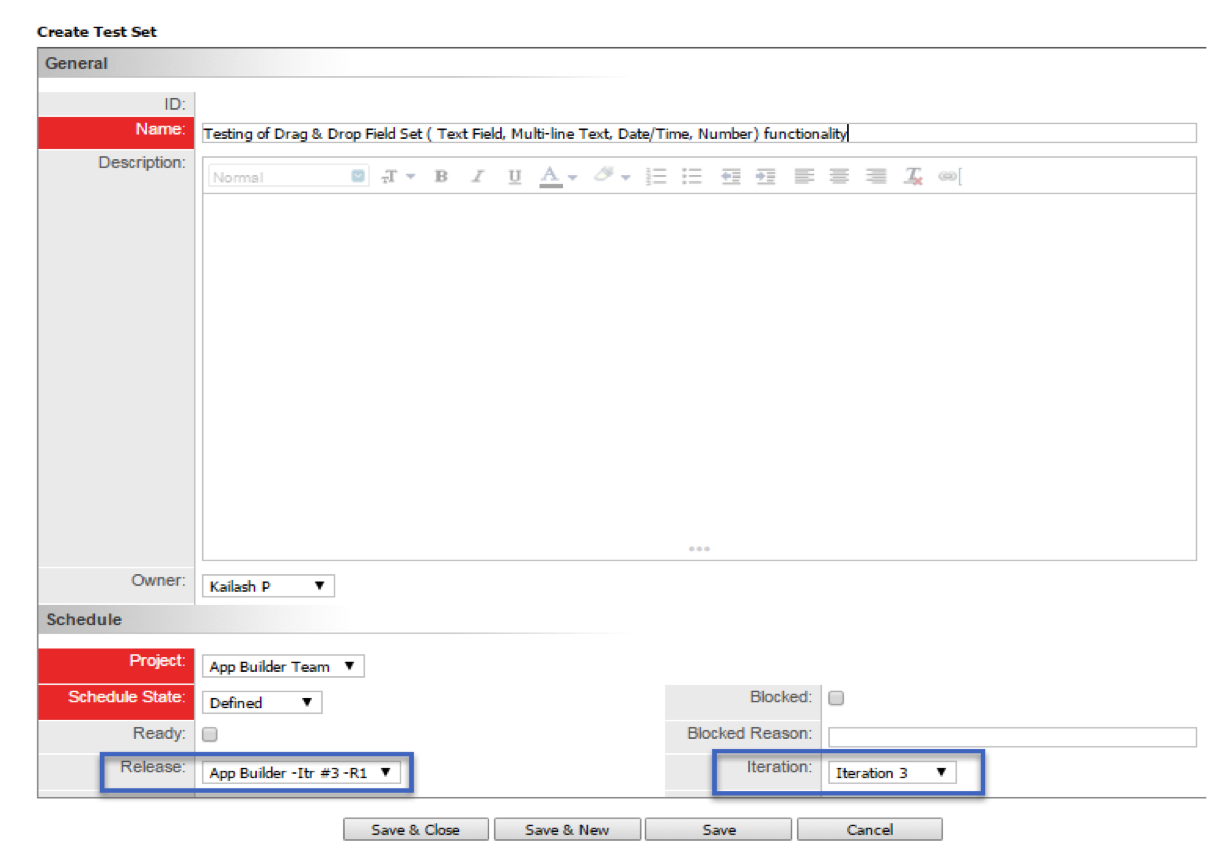
The screen below will open when a user clicks on Schedule New Test Set. Here a user can link between test sets, releases, and iterations.
Copy Test Cases from Test Plan Against Created Test Set
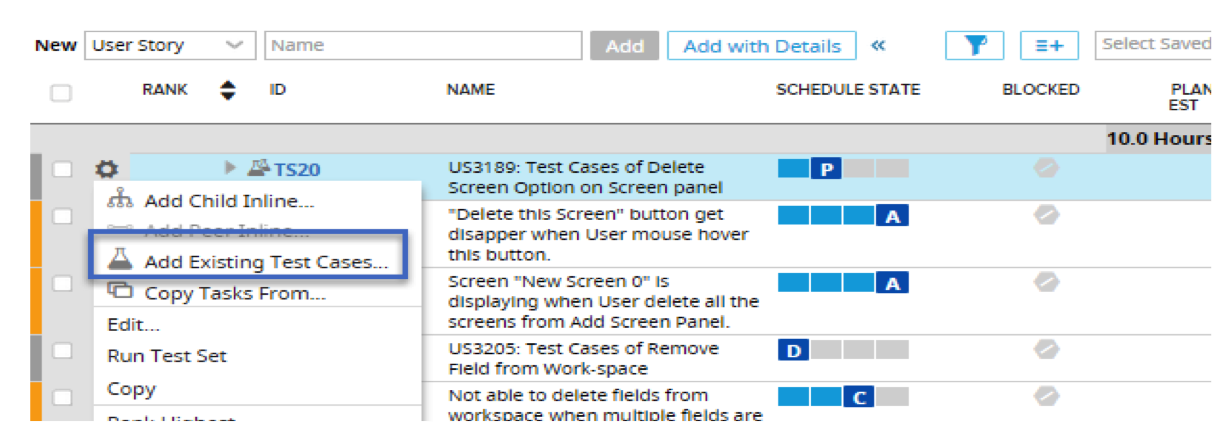
The next step is to copy the test cases in the test set by clicking on the icon against the test set (see the screenshot below).
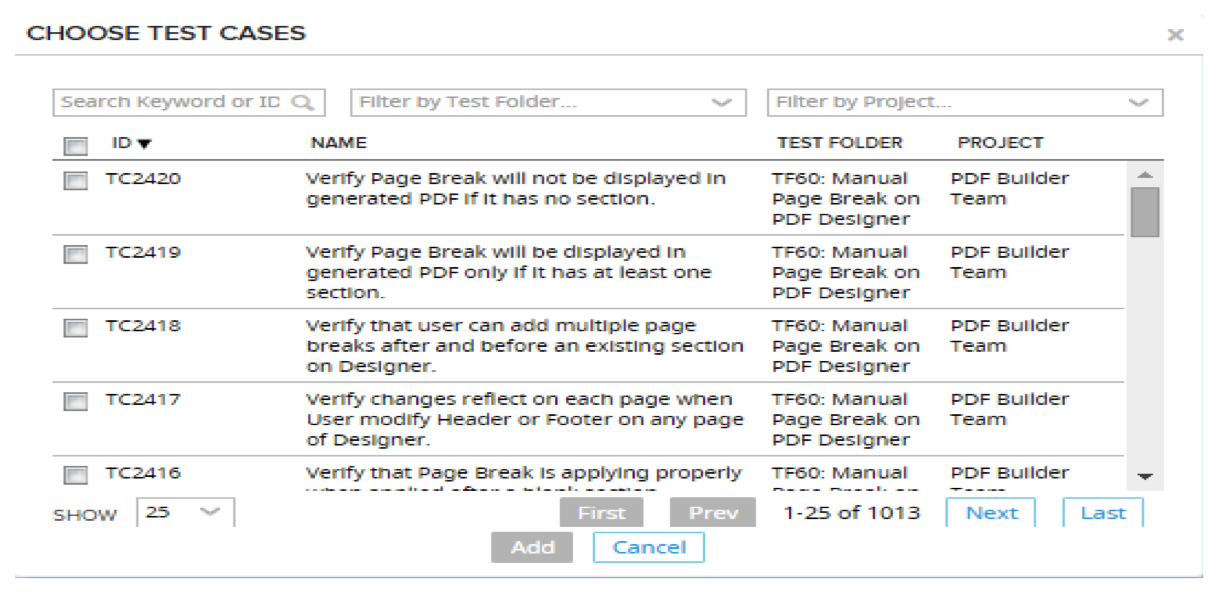
The screen below will open to choose the test cases from the test plan. Once the test cases are selected, they will display under the particular test set.
Execution of the Test Set and Defect Reporting
The last step is test set execution, where a user can run the test set for two releases or cycles.
- To run test sets, click the Track tab, then select Iteration Status
- Click the row action icon bin gear menu next to the test set and select Run Test Set
- The test run page displays all test cases and their related test steps contained within the test set. Use this page to run each test case within the test set.
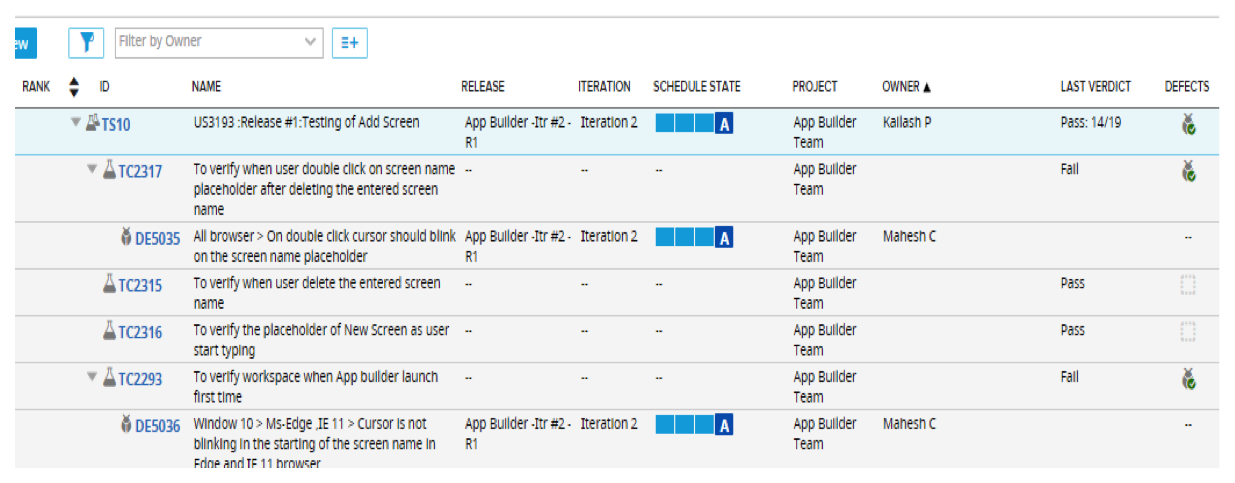
Below are the results after the test set execution for Release #1. Here we can see that 14 test cases passed and 5 test cases failed; when a user expends the TS10 in the screenshot below, all passed and failed test cases will be displayed.

In the screenshot below, we can see defect (DE5035, DE5036) is associated with a failed test case.
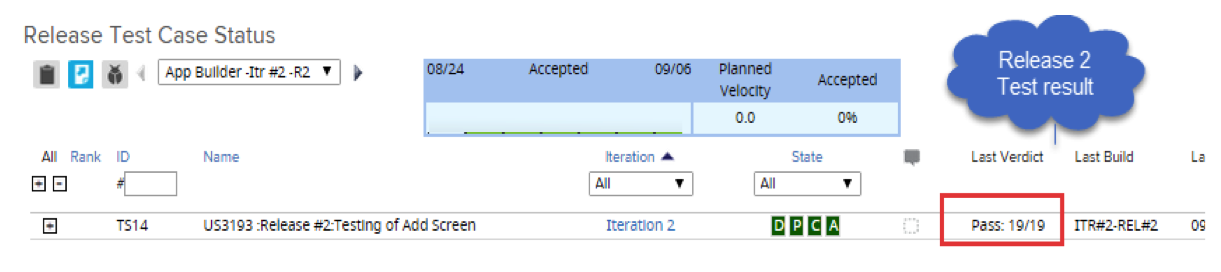
Below are the results after the test set execution for Release #2. Here we can see that all 19 test cases passed.
Conclusion
With this blog, we have understood how we can use test sets to execute test cases using the tool Rally. There are many other tools for test case management, like Jira, TEst TRack, and Test Rail, but Rally is one of the best tools for managing both test cases and defects in a single tool.
We have also understood how we can pull out test case execution reports for each release, and how we can use Rally Add-in to import test cases from MS-Excel directly.