
How to Develop Microservices Using .NET Core & Docker
With increasing business demands, we now develop very large and complex projects that take more time to build and deploy. Whenever QA reports any issue, we need to debug or fix it and then deploy the whole code. To reduce these complexities, most organizations are moving towards Microservices development and Docker for easy deployment and smooth service running.
In this blog post, I’ll explain why we should use Microservices, .NET Core, and Docker, and I will show both the step-by-step development of microservices using .NET Core and its run using Docker with different case studies.
Throughout the article, I’ll answer a few key questions, including:
- What is the software required for Windows?
- Why should we use microservices instead of a monolithic approach?
- Why should we use .NET Core?
- Why should we use Docker?
I’ll also explain how to create microservices using .NET Core, as well as show how to build and run it using Docker through real-life case study examples:
- Case 1: Run the same image in multiple containers
- Case 2: Manage different Containers
- Case 2: Run the same image in multiple environments
- Case 3: Tag and Run image with different versions
What is the software required for Windows?
- Windows 10 is required for Docker installation.
- Visual Studio 2017 has built-in support for Docker, so this is highly recommended.
- .NET Core SDK
- Docker for Windows
- Docker Tools
Why should we use microservices instead of a monolithic approach?
Microservices is an approach to develop small services that each run in its own process. We should develop microservices instead of one service (a monolithic approach) for a multitude of benefits, including:
- Microservices are smaller in size
- Microservices are easier to develop, deploy, and debug, because a fix only needs to be deployed onto the microservice with the bug, instead of across the board
- Microservices can be scaled quickly and can be reused among different projects
- Microservices work well with containers like Docker
- Microservices are independent of each other, meaning that if one of the microservices goes down, there is little risk of the full application shutting down
Why should we use .NET Core?
.NET Core is a great development tool for many reasons, including that it’s open source and is very helpful in developing high-performance and scalable systems. It supports cross-platform runtime, so if you create a service using .NET Core, it can be run on any platform. .NET Core is also helpful for faster development, as well as supporting built-in dependency injection and a cloud-based environment configuration. .NET Core also has Docker support, though it’s important to note that it does not support SQL Server Version 2005.
Why should we use Docker?
Docker is a tool that makes it easier to create, deploy, and run applications by using a containerization approach. These containers are lightweight and take less time to start than traditional servers. These containers also increase performance and lower cost, while offering proper resource management. Another benefit to using Docker is that you no longer need to pre-allocate RAM to each container.
How to create a new microservice using .NET Core and then build and run it using Docker
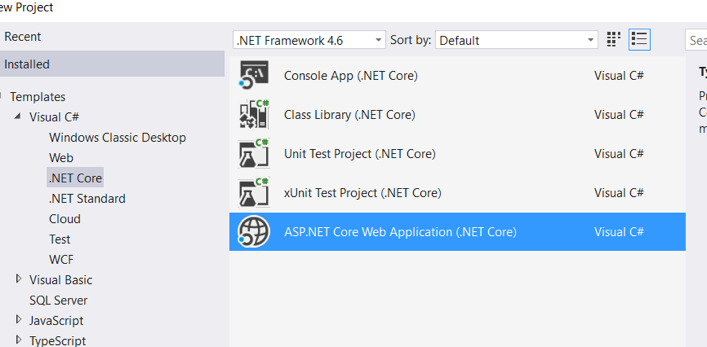
Step 1: Create a microservice (.NET Core WebAPI) with Docker support as shown below:
Select “ASP.NET Core Web Application (.NET Core)” from the drop-down menu.
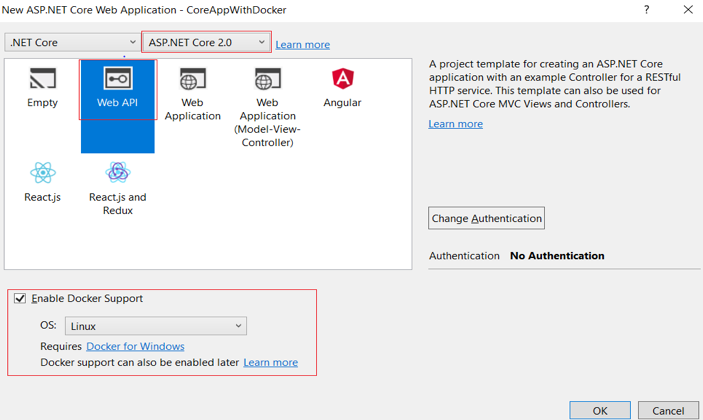
Select the “Enable Docker Support” option.
The following Application Structure will be created along with “Docker File.”

| Dockerfile | docker-compose.override.yml |
| This file is the entry point for running any Docker application.
It is used to build an image of the application’s published code in “obj/Docker/publish.” |
This file is used when running an application using Visual Studio. |
 |
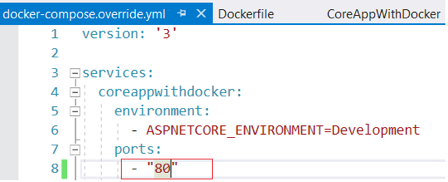 |
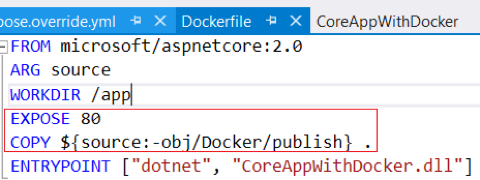
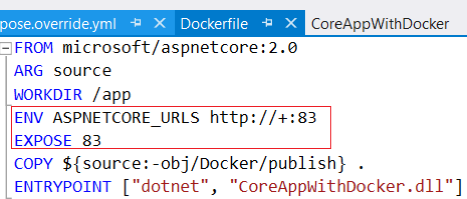
Step 2: Update Dockerfile and docker-compose.override.yml as shown below and build the application. 80 is the default Docker container port, so you should update it to a different port number, like 83.
| Dockerfile | docker-compose.override.yml |
 |
 |
Note: You can run the application using both Visual Studio and the Docker command line.
Step 3: Run the application using Visual Studio.
Step 4: Run the application using Docker Command. Open Application folder from command prompt and check the existing images using Docker images and running containers using Docker PS.
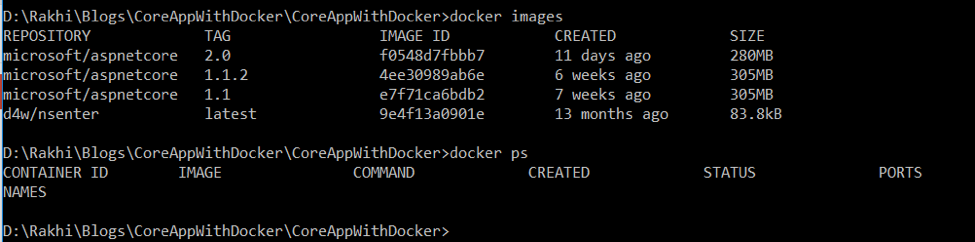
As you can see, there is no running container. So, run the following commands to create build:
To restore packages: dotnet restore

To publish the application code: dotnet publish -o obj/Docker/publish

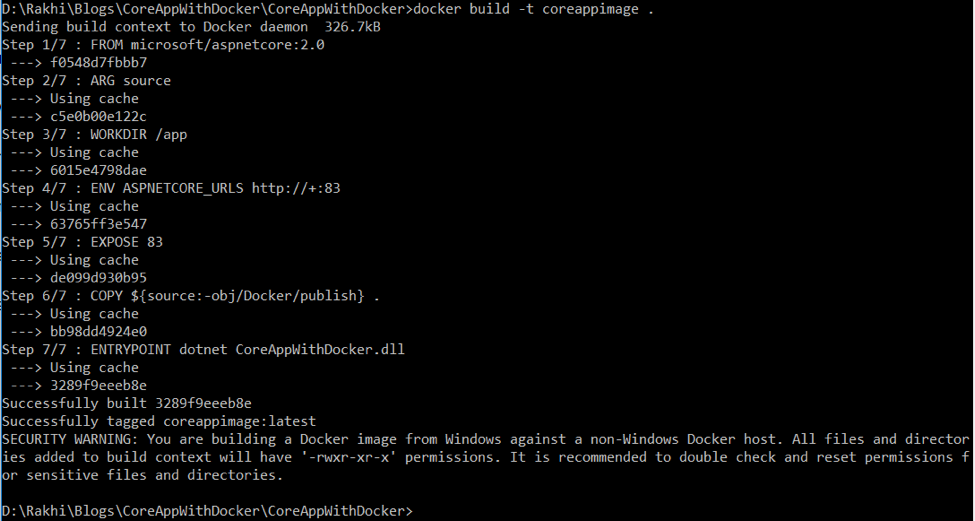
To build the image: docker build -t imagename
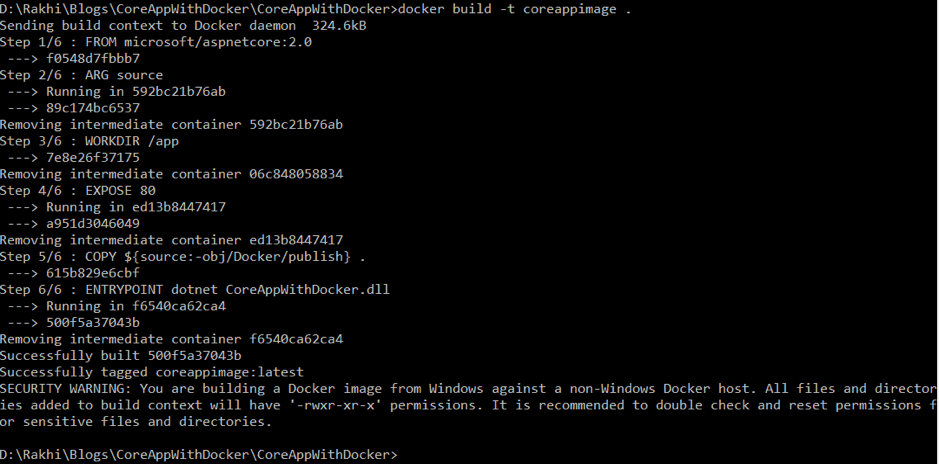
Now, check the newly created image “coreappimage” in Docker Images.

Run the image in a container: docker run -d -p 8001:83 –name core1 coreappimage

Check the running container: Docker PS

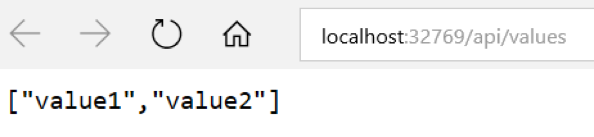
Now the application is running in the Core1 container with the URL http://localhost:8001.

Case 1: Run the same image in multiple containers
We can run the same image in multiple containers at the same time by using:
docker run -d -p 8002:83 –name core2 coreappimage
docker run -d -p 8003:83 –name core3 coreappimage

Check the running containers by using Docker PS.
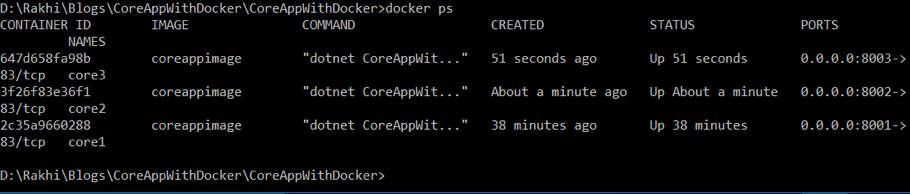
We can see that there are 3 containers running for the same image at 8001, 8002, and 8003.
| http://localhost:8001 | http://localhost:8002 | http://localhost:8003 |
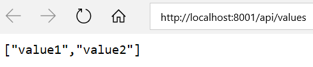 |
 |
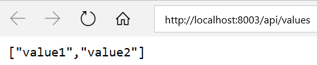 |
Case 2: Manage Containers: Stop/Start/Remove Containers
Stop container:
We can stop any running containers using “docker stop containerid/containername”
docker stop core1.

Note: Now this container core1 will be listed in the “All Containers” list but not in the running containers list.
Check running containers: docker ps:

Check all containers: docker ps -a
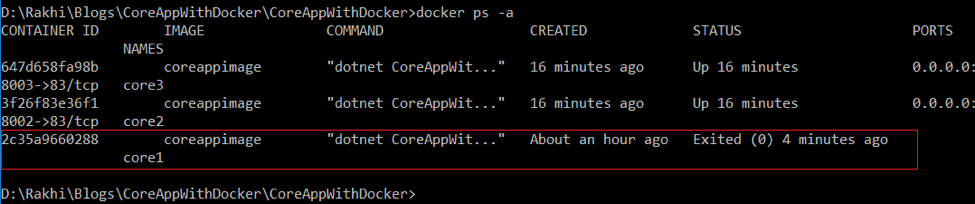
Note: Now the container running on http://localhost:8001 will not work.

Start Container:
We can start a stopped container using “docker start containerId/containername”
=> docker start core1
Note: Now it will be listed in the running containers list and http://localhost:8001 will start working.

Remove Container:
We can remove any stopped container, but then we will not be able to start it again.
So first we should stop the container before removing it:
=> docker stop core1
=> docker rm core1

Now this container will not be listed on the containers list:

Case 3: Run the same image in multiple environments
First, add transformations for different environments:
| Step 1 | Create the following AppSetting class and key. |  |
| Step 2 | In startup.cs, register IAppSettings to
resolve dependency. |
 |
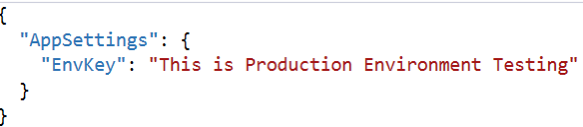
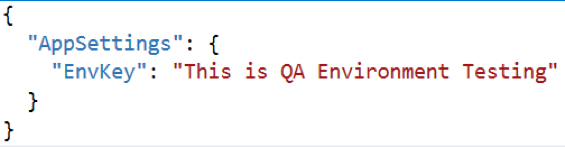
| Step 3 | Add two AppSettings json for QA/Production environment. | “appsettings.Production.json”
“appsettings.QA.json”
|
| Step 4 | Read this EnvKey Value in ValuesController. |  |
Now, create an image by repeating the same steps (dotnet restore, dotnet publish and docker build).
Note: If we do not specify the environ while running the container, it will take “Production” by default.
=> docker run -d -p 8004:83 –name core4 coreappimage

Run Image in a specific environment:
| => docker run -d -p 8005:83 –name core5 –env ASPNETCORE_ENVIRONMENT=Development coreappimage
|
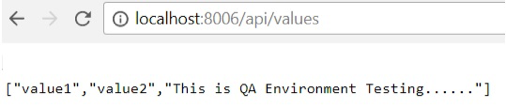
| => docker run -d -p 8006:83 –name core6 –env ASPNETCORE_ENVIRONMENT=QA coreappimage
|
| => docker ps
|


Case 4: Tag and Run image with different versions
Image tag is a version that allows you to differentiate different code base images. By default, every image is created with the tag “latest,” so whenever we create a new image for the updated code, it then replaces the existing image with same tag. This means that if we want to maintain the updated and previous code base images, we should tag them.
Let’s remove all running containers:
=> docker stop core2 core3 core4 core5 core6
=> docker rm core2 core3 core4 core5 core6
=> docker ps (Note: There is no running container here.)

Step 1: Tag previously created image “coreappimage” with version 1.0.
Syntax: docker tag imagename imagename :version
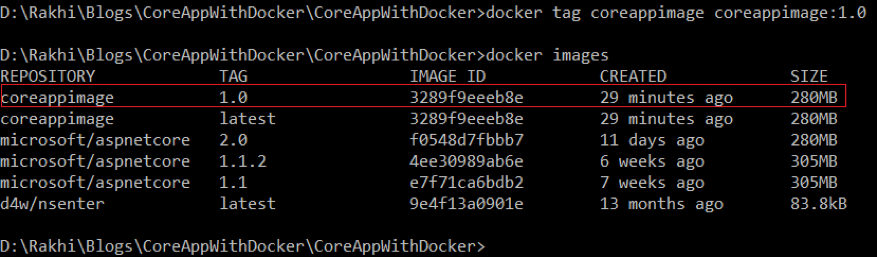
=> docker tag coreappimage coreappimage:1.0
Step 2: Update the application to apply the authorization filter so that the API will be accessible using the Authorization Header “auth_key:core.”
| Add CustomAuthorizeFilter class | 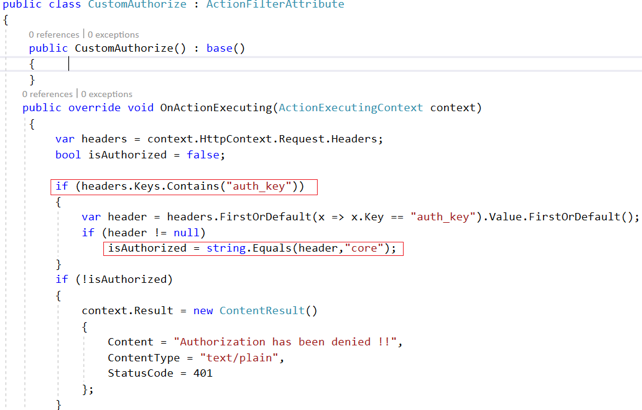 |
| Apply globally in Startup.cs | 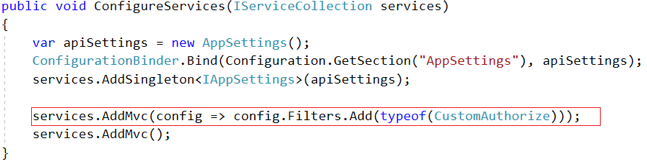 |
Create an image with 1.1 tag/version.

We can see two versions of the image under “coreappimage” 1.0 and 1.1.

| Run image with version 1.0:
=> docker run -d -p 8006:83 –name core1 –env ASPNETCORE_ENVIRONMENT=QA coreappimage:1.0 |
 |
| Run image with version 1.1:
docker run -d -p 8002:83 –name core2 –env ASPNETCORE_ENVIRONMENT=QA coreappimage:1.1 |
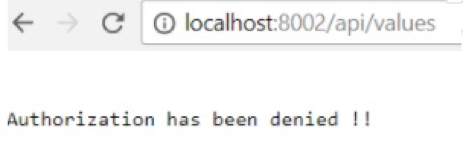 |
| This will be accessible only by passing the Authorization header auth_key:core. |  |
Note: Here we can see that for version 1.0 of the image, no authorization is required for the API or values. However, for version 1.1 of the image, we have to pass an authorization header.
Recent blog posts


Stay in Touch
Keep your competitive edge – subscribe to our newsletter for updates on emerging software engineering, data and AI, and cloud technology trends.