Getting Started with TestNG (Next Generation)
TestNG (Next Generation) is a testing framework that is influenced by both JUnit and NUnit, but has more powerful features and is easier to use. It is designed with a good set of capabilities that simplify testing requirements ranging from functional, regression, end-to-end, and more.
You should have prior knowledge of both Java and Eclipse in order to start using TestNG to its fullest potential.
Getting Started with TestNG
Step 1: Install the TestNG plug-in for Eclipse
If your Eclipse does not have an inbuilt TestNG plug-in, you can install it from Eclipse IDE. Select Help / Install New Software updates. Search for TestNg or directly enter the URL mentioned below.
For Eclipse 3.4 and above, enter http://beust.com/eclipse.
For Eclipse 3.3 and below, enter http://beust.com/eclipse1.
Eclipse will then guide you through the rest of the process.
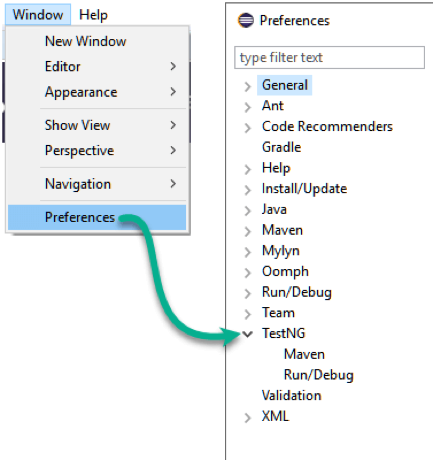
Once installation is complete, you can verify the TestNG is installed properly or not.
Step 2: TestNG Annotations
TestNG has given a set of annotations that allows to perform some Java logic before or after a certain point.
Here is a list of annotations that TestNG supports:
| Annotation | Description |
| @BeforeSuite | The annotated method will be run only once before all tests in this suite have run. |
| @AfterSuite | The annotated method will be run only once after all tests in this suite have run. |
| @BeforeClass | The annotated method will be run only once before the first test method in the current class is invoked. |
| @AfterClass | The annotated method will be run only once after all the test methods in the current class have run. |
| @BeforeTest | The annotated method will be run before any test method belonging to the classes inside the <test> tag is run. |
| @AfterTest | The annotated method will be run after all the test methods belonging to the classes inside the <test> tag have run. |
| @BeforeGroups | The list of groups that this configuration method will run before. This method is guaranteed to run shortly before the first test method that belongs to any of these groups is invoked. |
| @AfterGroups | The list of groups that this configuration method will run after. This method is guaranteed to run shortly after the last test method that belongs to any of these groups is invoked. |
| @BeforeMethod | The annotated method will be run before each test method. |
| @AfterMethod | The annotated method will be run after each test method. |
| @Test | Marks a class or a method as a part of the test. |
| @DataProvider | Marks a method as supplying data for a test method. The annotated method must return an Object[][] where each Object[] can be assigned the parameter list of the test method. The @Test method that wants to receive data from this DataProvider needs to use a dataProvider name equals to the name of this annotation. |
| @Listeners | Defines listeners on a test class. |
| @Parameters | Describes how to pass parameters to a @Test method. |
Step 3: Conduct your First Test using Annotations
Your first test should be conducted using these annotations. Try out a few and see if they are completing the task they need to complete.
package testng;

import org.testng.annotations.Test;

import org.testng.annotations.BeforeMethod;

import org.testng.annotations.AfterMethod;

import org.testng.annotations.BeforeClass;

import org.testng.annotations.AfterClass;

import org.testng.annotations.BeforeTest;

import org.testng.annotations.AfterTest;

import org.testng.annotations.BeforeSuite;

import org.testng.annotations.AfterSuite;

public class Annotations

{

// test case 1

@Test

public void testCase1()

 {  System.out.println("@test1");  }

// test case 2

@Test

public void testCase2()

{ System.out.println("@test2"); }

@BeforeMethod

public void beforeMethod()

{ System.out.println("@beforeMethod"); }

@AfterMethod

public void afterMethod()

{ System.out.println("@afterMethod"); }

@BeforeClass

public void beforeClass()

{ System.out.println("@beforeClass"); }

@AfterClass

public void afterClass()

{ System.out.println("@afterClass"); }

@BeforeTest

public void beforeTest()

{ System.out.println("@beforeTest"); }

@AfterTest

public void afterTest()

{ System.out.println("@afterTest"); }

@BeforeSuite

public void beforeSuite()

{ System.out.println("@beforeSuite"); }

}
Step 4: Invoke the TestNG Suite File – TestNG.XML
You can invoke TestNG in several different ways:
- With a testing.xml file
- With a build tool
- From the command line
Here, we will cover the invocation from testing.xml.
Below is the format of the testing.xml file:
<!DOCTYPE suite SYSTEM "http://testng.org/testng-1.0.dtd" >

<suite name="Suite1" verbose="1" >

<test name="TestNGFirstTest" >

<classes>

<class name=" TestngAnnotation " />

</classes>

</test>

</suite>
You have an option to specify package names instead of class names:
<!DOCTYPE suite SYSTEM "http://testng.org/testng-1.0.dtd" >

<suite name="Suite1" verbose="1" >

<test name="Regression1"   >

<packages>

<package name=" testng" />

</packages>

</test>

</suite>
STEP 5: TestNG Parameter Test (XML and @DataProvider)
Test methods can have parameters. You may use any number of parameters on each of your test method, and you can instruct TestNG to pass the correct parameters with the @Parameters annotation. In the case of complex objects, you can use @DataProvider annotation.
5.1 Parameter Test with XML
This feature is used to initialize fields inside your classes with values that will then be used by your test methods.
Parameters passed in test methods are initialized with values specified in testng.xml.
@Parameters({ "first-name" })

@Test public void parameterTest(String firstName){

System.out.println("Parameterised Value is : " + firstName);

assert "Neha".equals(firstName);

}
In this code, we specify that the parameter firstName of your Java method should receive the value of the XML parameter called first-name.
This XML parameter is defined in testng.xml as below:
<!DOCTYPE suite SYSTEM "http://testng.org/testng-1.0.dtd" >

<suite name="Suite1" >

<test name="TestNGFirstTest" >

<parameter name = “first-name” value = “Neha/>”

<classes>

<class name=" parameterTest " />

</classes>

</test>

</suite>
5.2 Parameter Test with @DataProvider
There is another way to parameterize the test methods if you need to pass complex parameters.
A Data Provider is a method on your class that returns an array of array of objects. This method is annotated with @DataProvider.
//This method will provide data to any test method that declares that its Data Provider is named "test1"

@DataProvider(name = "test1")

public Object[][] createData1() {

return new Object[][] {

{ "FName1", new Integer(36) },

{ "FName2", new Integer(37)},

};

}

//This test method declares that its data should be supplied by the Data Provider named "test1"

@Test(dataProvider = "test1")

public void verifyData1(String n1, Integer n2) {

System.out.println(n1 + " " + n2);

}
A @Test method specifies its Data Provider with the dataProvider attribute. This name must correspond to a method on the same class annotated with @DataProvider(name="...") with a matching name.
By default, the data provider will be searched for in the current test class or one of its base classes. If you want to put your data provider in a different class, your code should be:
public class StaticProvider {

@DataProvider(name = "test1")

public Object[][] createData1() {

return new Object[][] {

{ "FName1", new Integer(36) },

{ "FName2", new Integer(37)},

};

}

}

public class MyTest {

@Test(dataProvider = " test1", dataProviderClass = StaticProvider.class)

public void test(Integer n) {

// ...

}

}
STEP 6: Dependencies with annotations
You can use the attributes dependsOnMethods or dependsOnGroups, found on the @Test annotation.
// In this example, method1() is declared as depending on method method2(), which guarantees that method2() will always be invoked first.

@Test

public void method2() {}

@Test(dependsOnMethods = { "method2" })

public void method1() {}
You can also have methods that depend on entire groups:
//This example shows multiple groups and dependencies on group

@Test(groups = { "Group1" })

public void method2() {}

@Test(groups = { " Group2" })

public void method3() {}

@Test(dependsOnGroups = { " Group1" })

public void method1() {}

@Test(dependsOnGroups = { " Group2" })

public void method3() {}

@Test(dependsOnGroups = { " Group1" , “Group2”})

public void method4() {}
Below you can find the testng.xml to run the test with group dependencies
<!DOCTYPE suite SYSTEM "http://testng.org/testng-1.0.dtd" >

<suite name="Suite1”>

<test name="Test1">

<groups>

<run>

<include name="Group1"/>

</run>

</groups>

<classes>

<class name=" GroupTestClass " />

</classes>

</test>

</suite>
Recent blog posts


Stay in Touch
Keep your competitive edge – subscribe to our newsletter for updates on emerging software engineering, data and AI, and cloud technology trends.